So, you know how we're always talking about AI these days? Well, we've been doing some pretty interesting stuff with it here at Up North Media (that's our digital design, marketing, and AI agency here in Omaha). And honestly, I wanted to share something we built that I think you'll find pretty fascinating – whether you're a coder, a marketer, a designer, or just someone who's curious about what AI can actually do in the real world.
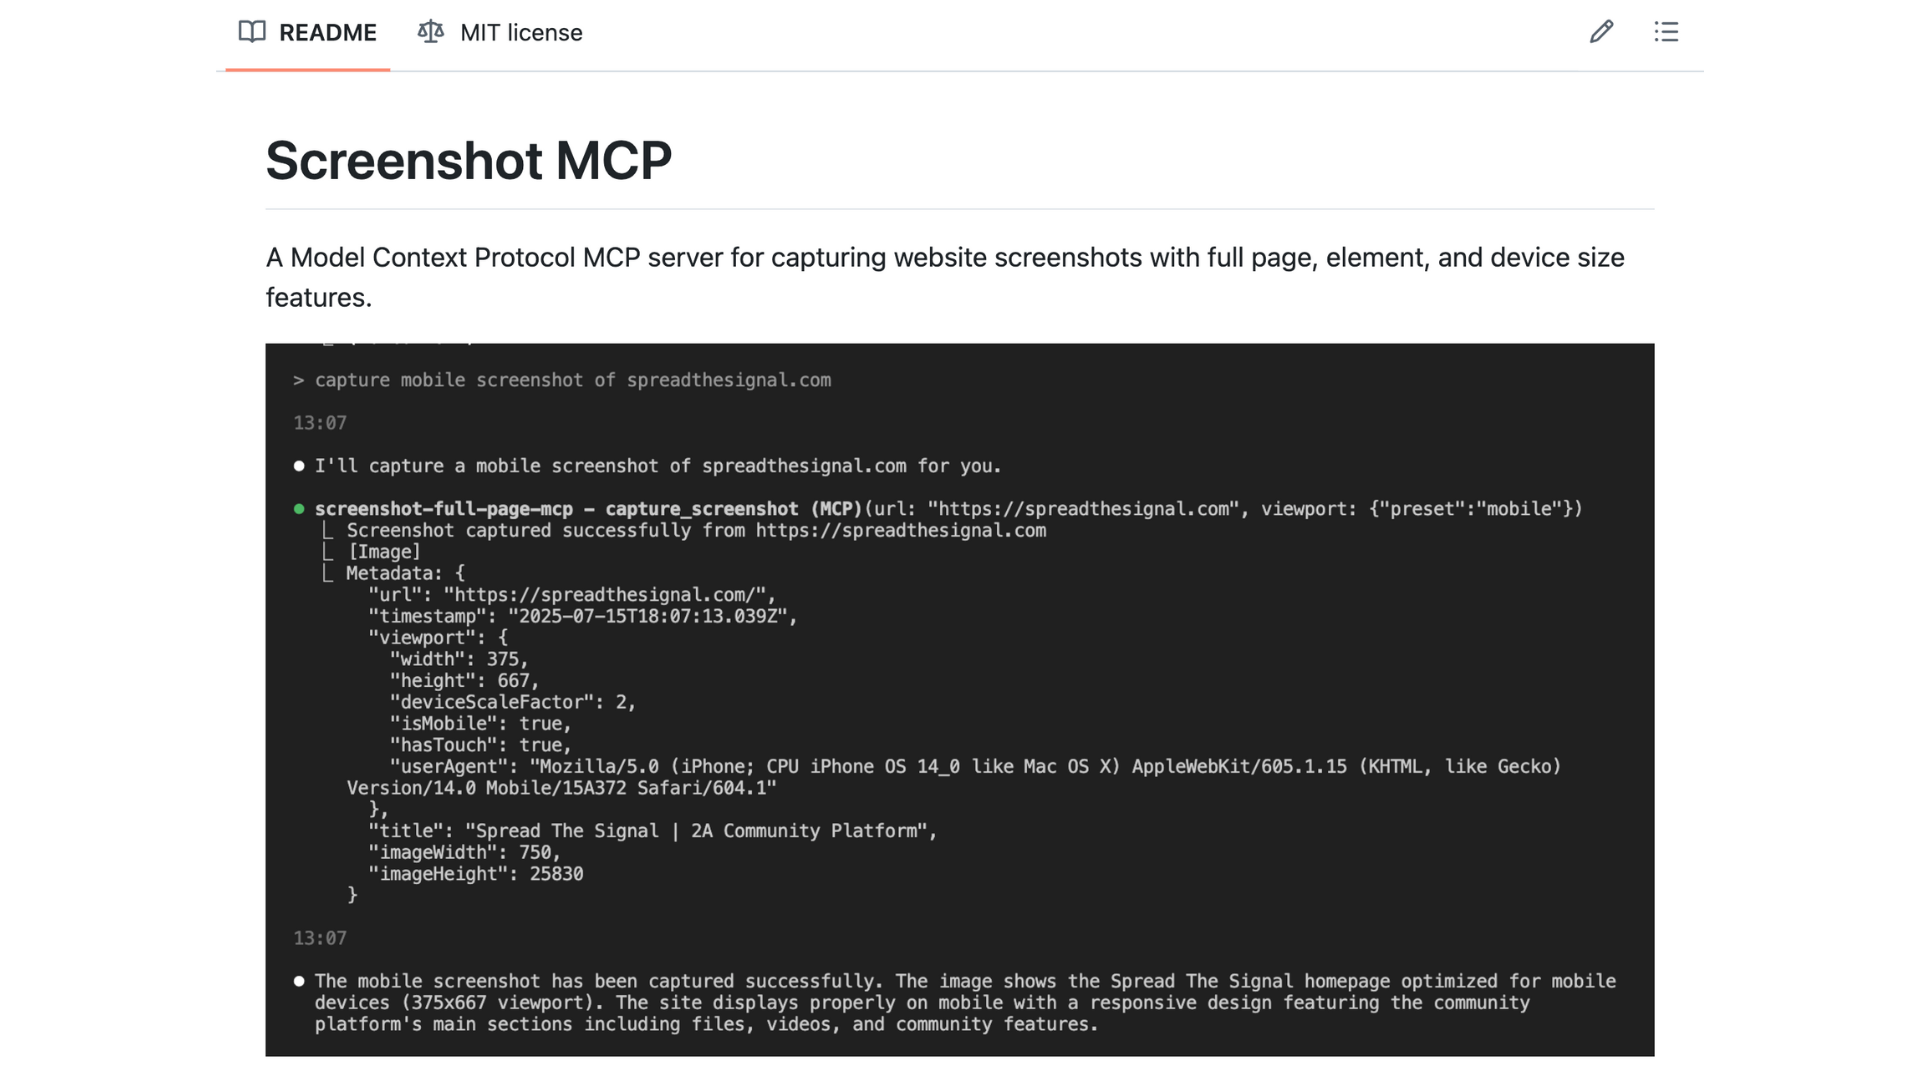
We created something called ScreenshotMCP, and before your eyes glaze over at the technical name, let me explain what it actually does: it's a tool that lets AI systems take screenshots of websites automatically. Think of it like having a really smart assistant who can look at any website and capture exactly what you need to see, without you having to manually do it yourself.
But here's the thing – to understand why this is actually a big deal, we need to talk about something called Model Context Protocols, or MCPs. Don't worry, I'll explain this in a way that makes sense.
What Are Model Context Protocols? (And Why Should You Care?)
Okay, so imagine you're trying to get different people who speak different languages to work together on a project. Without a translator, it's chaos, right? That's basically what was happening with AI systems and the tools they need to use.
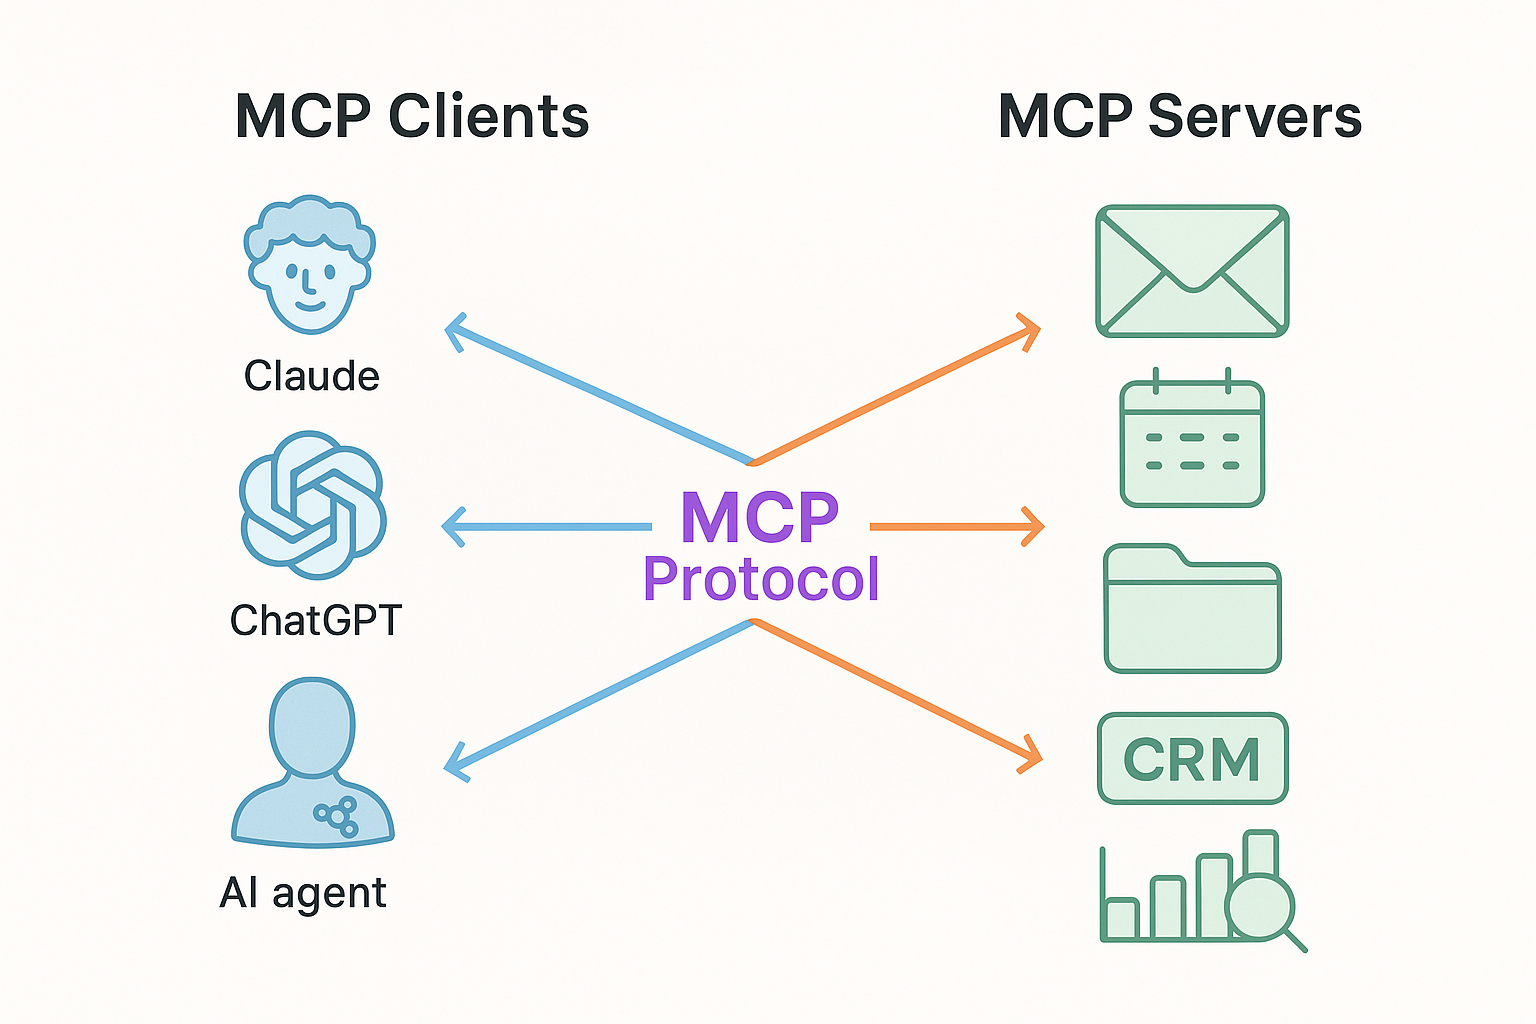
Before MCPs, if you wanted an AI to interact with, say, a screenshot tool, a database, or a web service, you'd need to build a custom "translator" for each one. It was like having to learn a new language every time you wanted to talk to a different person. Not very efficient.
MCPs solve this by creating a universal language that AI systems can use to talk to pretty much any tool or service. It's like having Google Translate, but for AI systems and software tools.
Here's What Was Broken Before MCPs
Think about it this way: every time you wanted to connect your AI to a new tool, you had to:
- Build a custom connection (like creating a new cable every time you wanted to plug in a device)
- Figure out how to handle passwords and security (different for every tool)
- Deal with different data formats (like trying to fit a square peg in a round hole)
- Maintain all these different connections when things changed
It was honestly a nightmare for developers and made it nearly impossible for non-technical folks to get AI to work with the tools they actually needed.
MCPs fix this by giving us:
- One Universal Language: Like having USB-C for everything instead of needing different cables
- Easy Setup: Plug and play, just like connecting a new device
- Built-in Security: No need to worry about passwords and permissions every time
- It Just Works: Multiple tools can work together without breaking each other
Why We Actually Built This Thing
So here's the real story. We're a digital agency, which means we're constantly building websites, running marketing campaigns, and helping clients with their online presence. And if there's one thing we do A LOT of, it's taking screenshots.
Let me paint you a picture of what our life was like before ScreenshotMCP:
1. Testing Websites Was a Total Pain
Picture this: we'd build a website, and then someone (usually me) would have to manually check how it looked on mobile, tablet, desktop, different browsers... you get the idea. We'd spend hours taking screenshots, switching between devices, trying to catch every little issue. It was tedious, time-consuming, and honestly, we'd sometimes miss things because, well, humans aren't perfect.
2. Client Meetings Needed Better Visuals
You know what clients love? Seeing their stuff. Not just hearing about it, but actually seeing it. We needed a way to quickly grab screenshots of their websites, show them different versions of landing pages, document progress as we built things. But doing this manually meant someone was always scrambling to get screenshots ready before meetings.
3. Keeping Up with Competitors
Our marketing team needed to keep an eye on what competitors were doing with their websites and ads. But manually checking and screenshotting competitor sites every week? That's not exactly the best use of our time (or anyone's sanity).
4. The AI Dream
Here's where it gets really interesting. We realized that with tools like Claude that can actually "see" and analyze images, we could potentially have AI look at screenshots and give us feedback. Imagine asking an AI: "How does this website look on mobile?" and getting actual, useful feedback. But first, we needed a way to automatically get those screenshots to the AI.
How We Actually Built This Thing (Don't Worry, I'll Keep It Simple)
Okay, so now for the fun part – how does this thing actually work? I promise I'll explain it in a way that makes sense, even if you've never written a line of code in your life.
Think of ScreenshotMCP like a really smart robot that lives in your computer and knows how to take pictures of websites. But instead of just any robot, it's more like a specialized photographer who:
- Knows exactly how to set up different cameras (mobile, tablet, desktop views)
- Can wait for the perfect moment to take the shot (when pages finish loading)
- Automatically edits the photos to make them the right size
- Never gets tired and can work on multiple projects at once
The Three Main Parts
1. The Manager (What We Call the "Main Server")
This is like the front desk of a busy photography studio. When you ask for a screenshot, the manager:
- Takes your request and makes sure it's legitimate (no sketchy websites!)
- Decides which photographer should handle your job
- Keeps track of all the work being done
- Cleans up when jobs are finished
For the developers reading this, this all happens in our index.js file starting around line 292, where we initialize the MCP server and handle all the incoming requests.
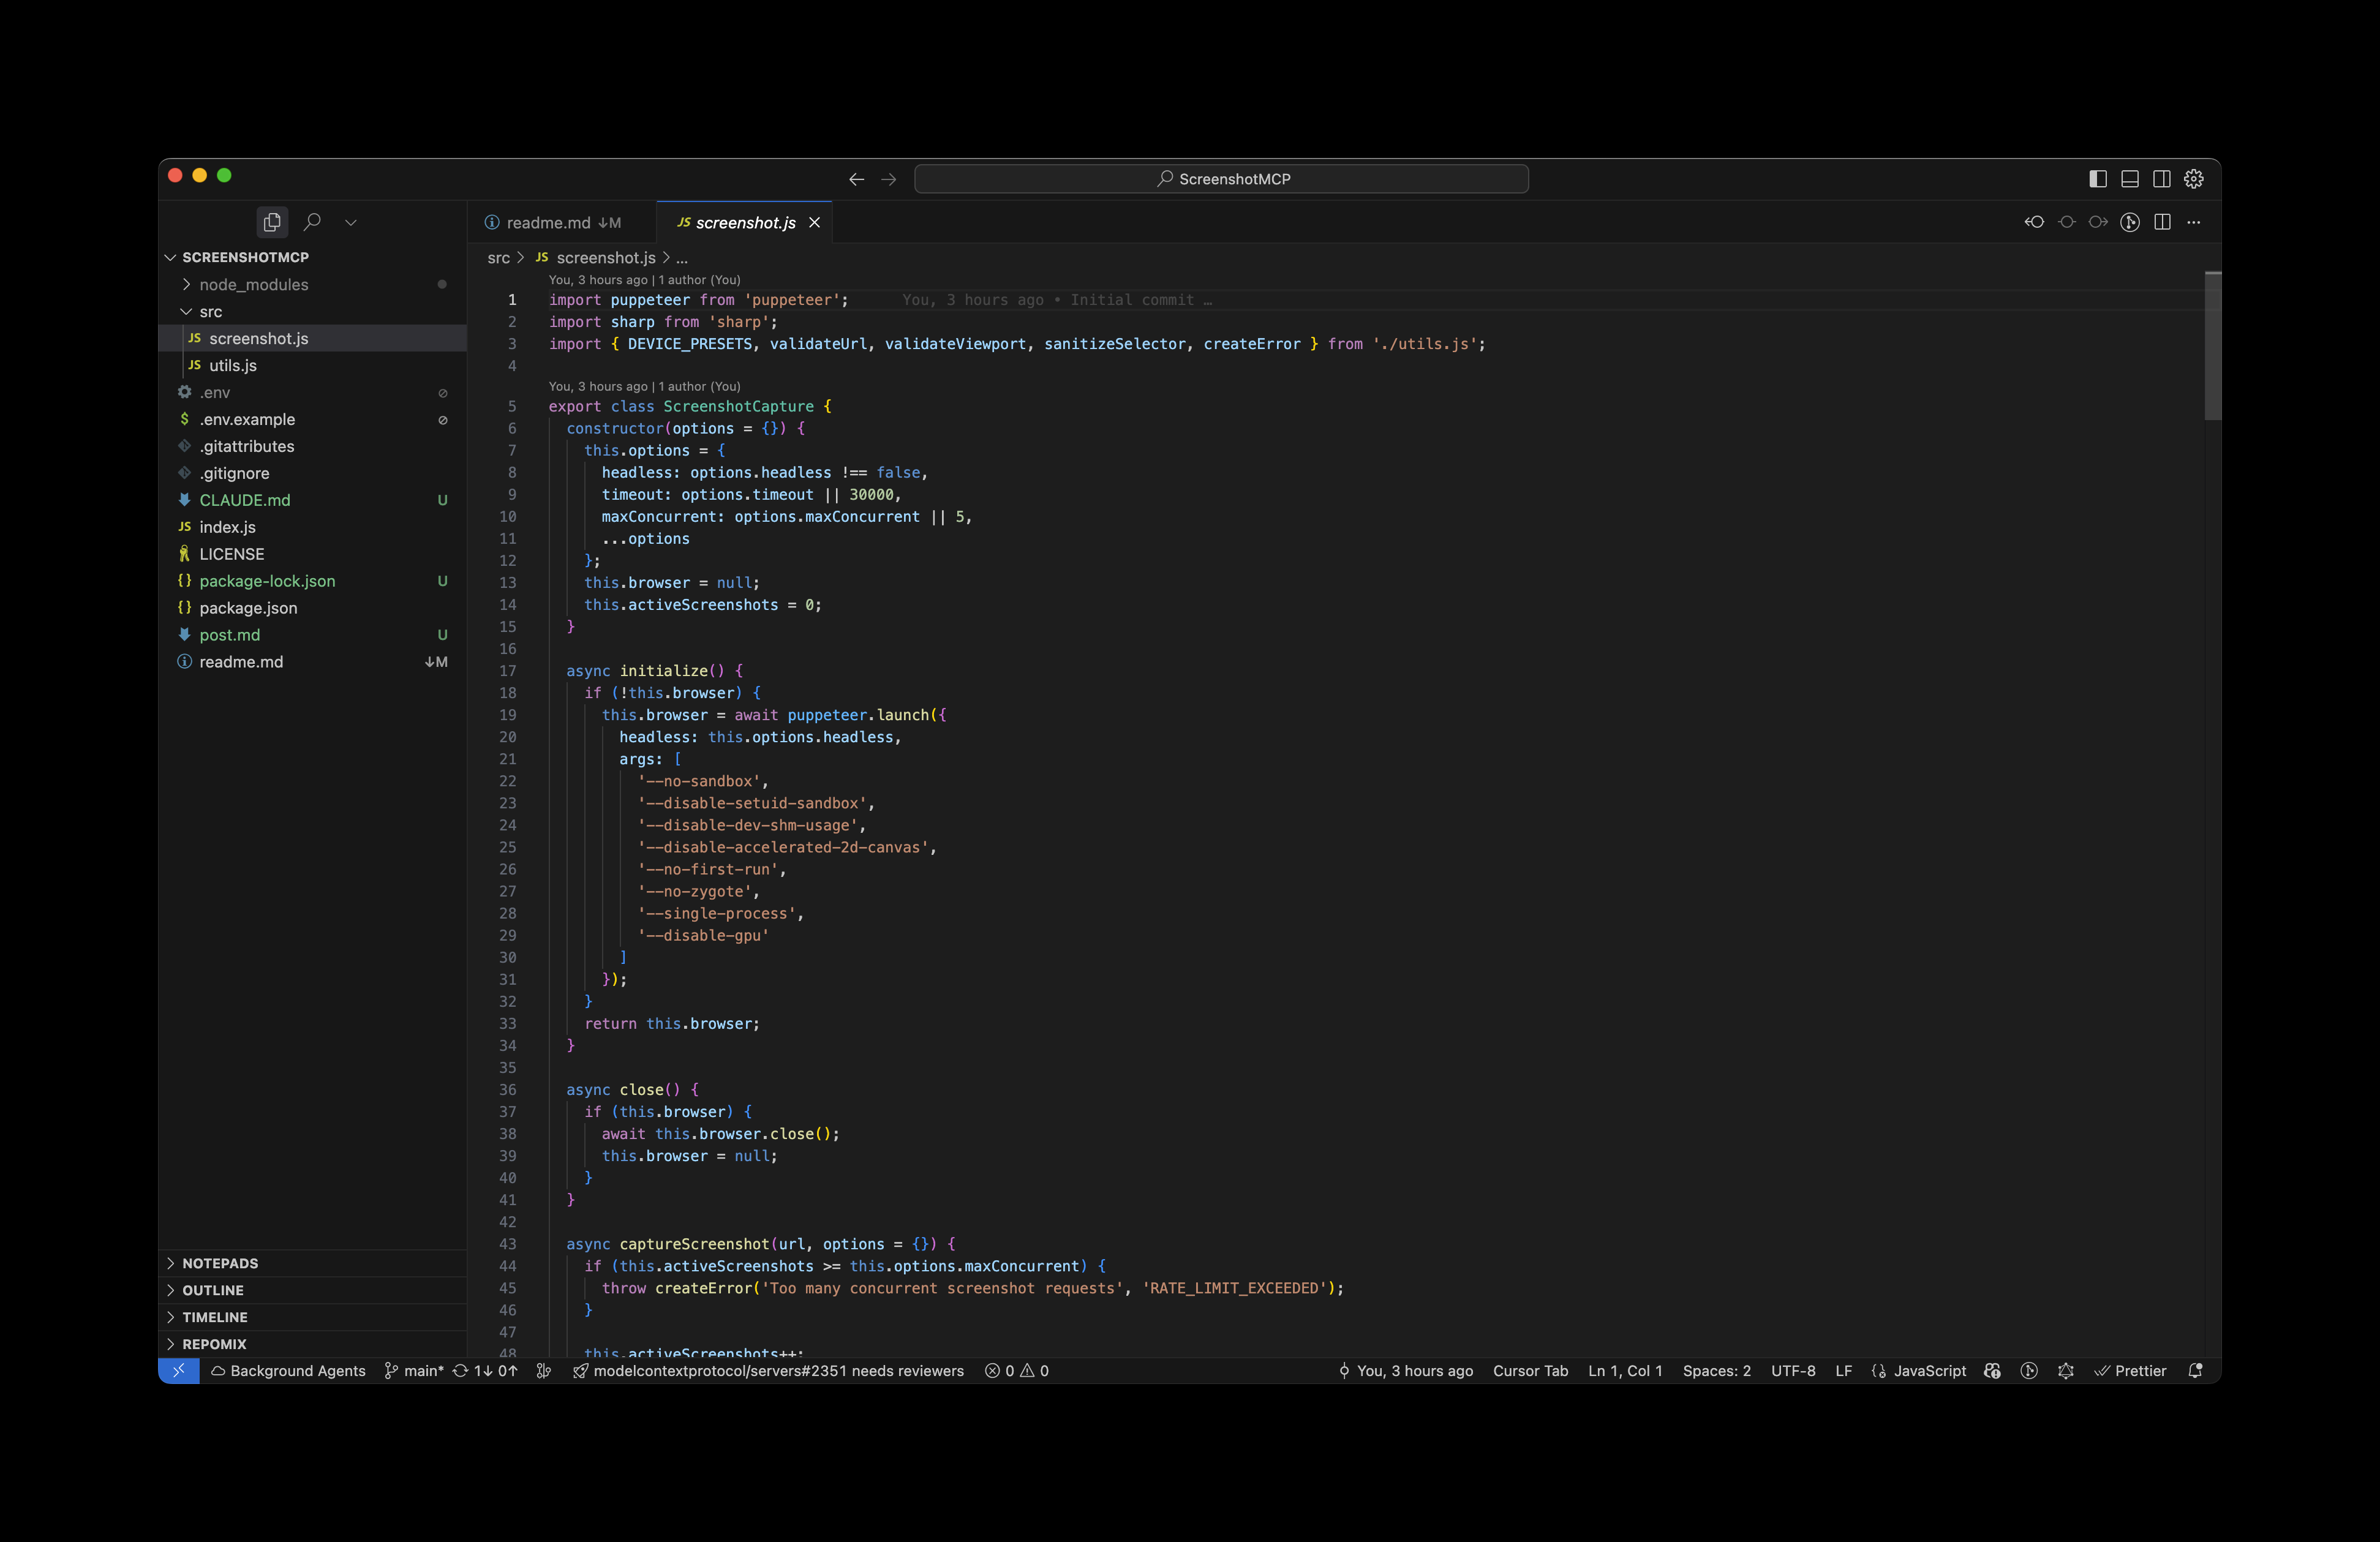
2. The Photographer (Our "ScreenshotCapture Class")
This is the actual worker that takes the screenshots. It's powered by something called Puppeteer, which is basically a way to control a web browser automatically. Think of it like having a browser that can be controlled by code instead of mouse clicks.
Our photographer can:
- Open up different types of "cameras" (mobile, tablet, desktop views)
- Wait for websites to fully load before taking the picture
- Take pictures of entire pages or just specific parts
- Automatically resize images so they're not too big
This magic happens in our src/screenshot.js file, starting around line 5.
3. The Assistant (Our "Utilities")
Every good photographer needs an assistant to handle the boring stuff:
- Managing different camera settings (that's our device presets)
- Making sure websites are safe to visit (URL validation)
- Handling errors when things go wrong
- Keeping everything organized
All of this support work is in our src/utils.js file.
The Cool Features That Make It Actually Work
It Won't Crash Your Computer
Here's something important: we made sure this thing won't overwhelm your computer. It's like having a photography studio that only lets 5 people work at once, so nobody gets in each other's way.
For the technical folks, here's how we limit concurrent requests:
// Maximum 5 concurrent screenshots (configurable)
const MAX_CONCURRENT_SCREENSHOTS = process.env.MAX_CONCURRENT_SCREENSHOTS || 5;
You can change this number if your computer is a beast and can handle more, or dial it down if you're working on something older.
It Knows How to Pretend to Be Different Devices
Remember how I said it's like having different cameras? Well, we've pre-programmed it with the exact settings to mimic popular devices:
const devicePresets = {
  mobile: { width: 375, height: 667, deviceScaleFactor: 2, isMobile: true },
  tablet: { width: 768, height: 1024, deviceScaleFactor: 2, isMobile: true },
  desktop: { width: 1920, height: 1080, deviceScaleFactor: 1, isMobile: false }
};
What this means in plain English: it can take pictures that look exactly like what someone would see on their iPhone, iPad, or computer monitor. No more guessing!
It's Patient (Unlike Most of Us)
Websites can be slow to load, especially if they have lots of images or complicated stuff happening. Our tool is smart enough to wait for different things:
- It can wait for a specific button or image to appear
- It can wait for the page to stop loading stuff in the background
- It can wait for a specific amount of time
- It can even wait for custom conditions you set up
This is huge because there's nothing worse than a screenshot of a half-loaded page.
It Automatically Makes Images the Right Size
Nobody wants a screenshot that's so big it crashes their computer or takes forever to load. We use something called Sharp (it's an image processing tool) to automatically resize images if they're too big. Think of it like having an automatic photo editor that ensures your images are always a reasonable size – max 8000x8000 pixels, which is plenty big for most uses.
What Can This Thing Actually Do?
1. Take Pictures of Entire Web Pages
You know how when you take a screenshot on your phone, it only captures what's visible on screen? Well, our tool can capture entire web pages, even the parts you'd have to scroll to see. It's like having a camera that can somehow photograph a whole building, even when you're standing right in front of it.
The technical name for this is capture_screenshot, and it:
- Automatically scrolls through the page to get everything
- Can pretend to be different devices (mobile, tablet, desktop)
- Waits for everything to load properly before taking the picture
- Handles tricky websites that load content as you scroll
2. Focus on Specific Parts of Pages
Sometimes you don't want the whole page – just the navigation bar, or just the footer, or just that one section that's important. Our capture_element tool lets you do exactly that:
- Point it at any part of a webpage using CSS selectors (don't worry, I'll explain this)
- Automatically finds and captures just that element
- Handles responsive designs (so it works on different screen sizes)
- Tells you if it can't find what you're looking for
3. Know Your Device Options
The list_device_presets tool is like having a menu of different "cameras" you can choose from:
- See all the different device types available
- Get consistent results every time
- Switch between devices easily
- Set up custom screen sizes if needed
How to Actually Use It (The Fun Part!)
Here's where it gets really cool. If you're using Claude Code or another AI coding tool, you can just talk to it like you're talking to a person:
Want a Basic Screenshot?
Just say: "Take a screenshot of https://example.com"
Behind the scenes, the AI translates this into:
{
  "tool": "capture_screenshot",
  "arguments": {
    "url": "https://example.com"
  }
}
But you don't need to know that! You just ask for what you want.
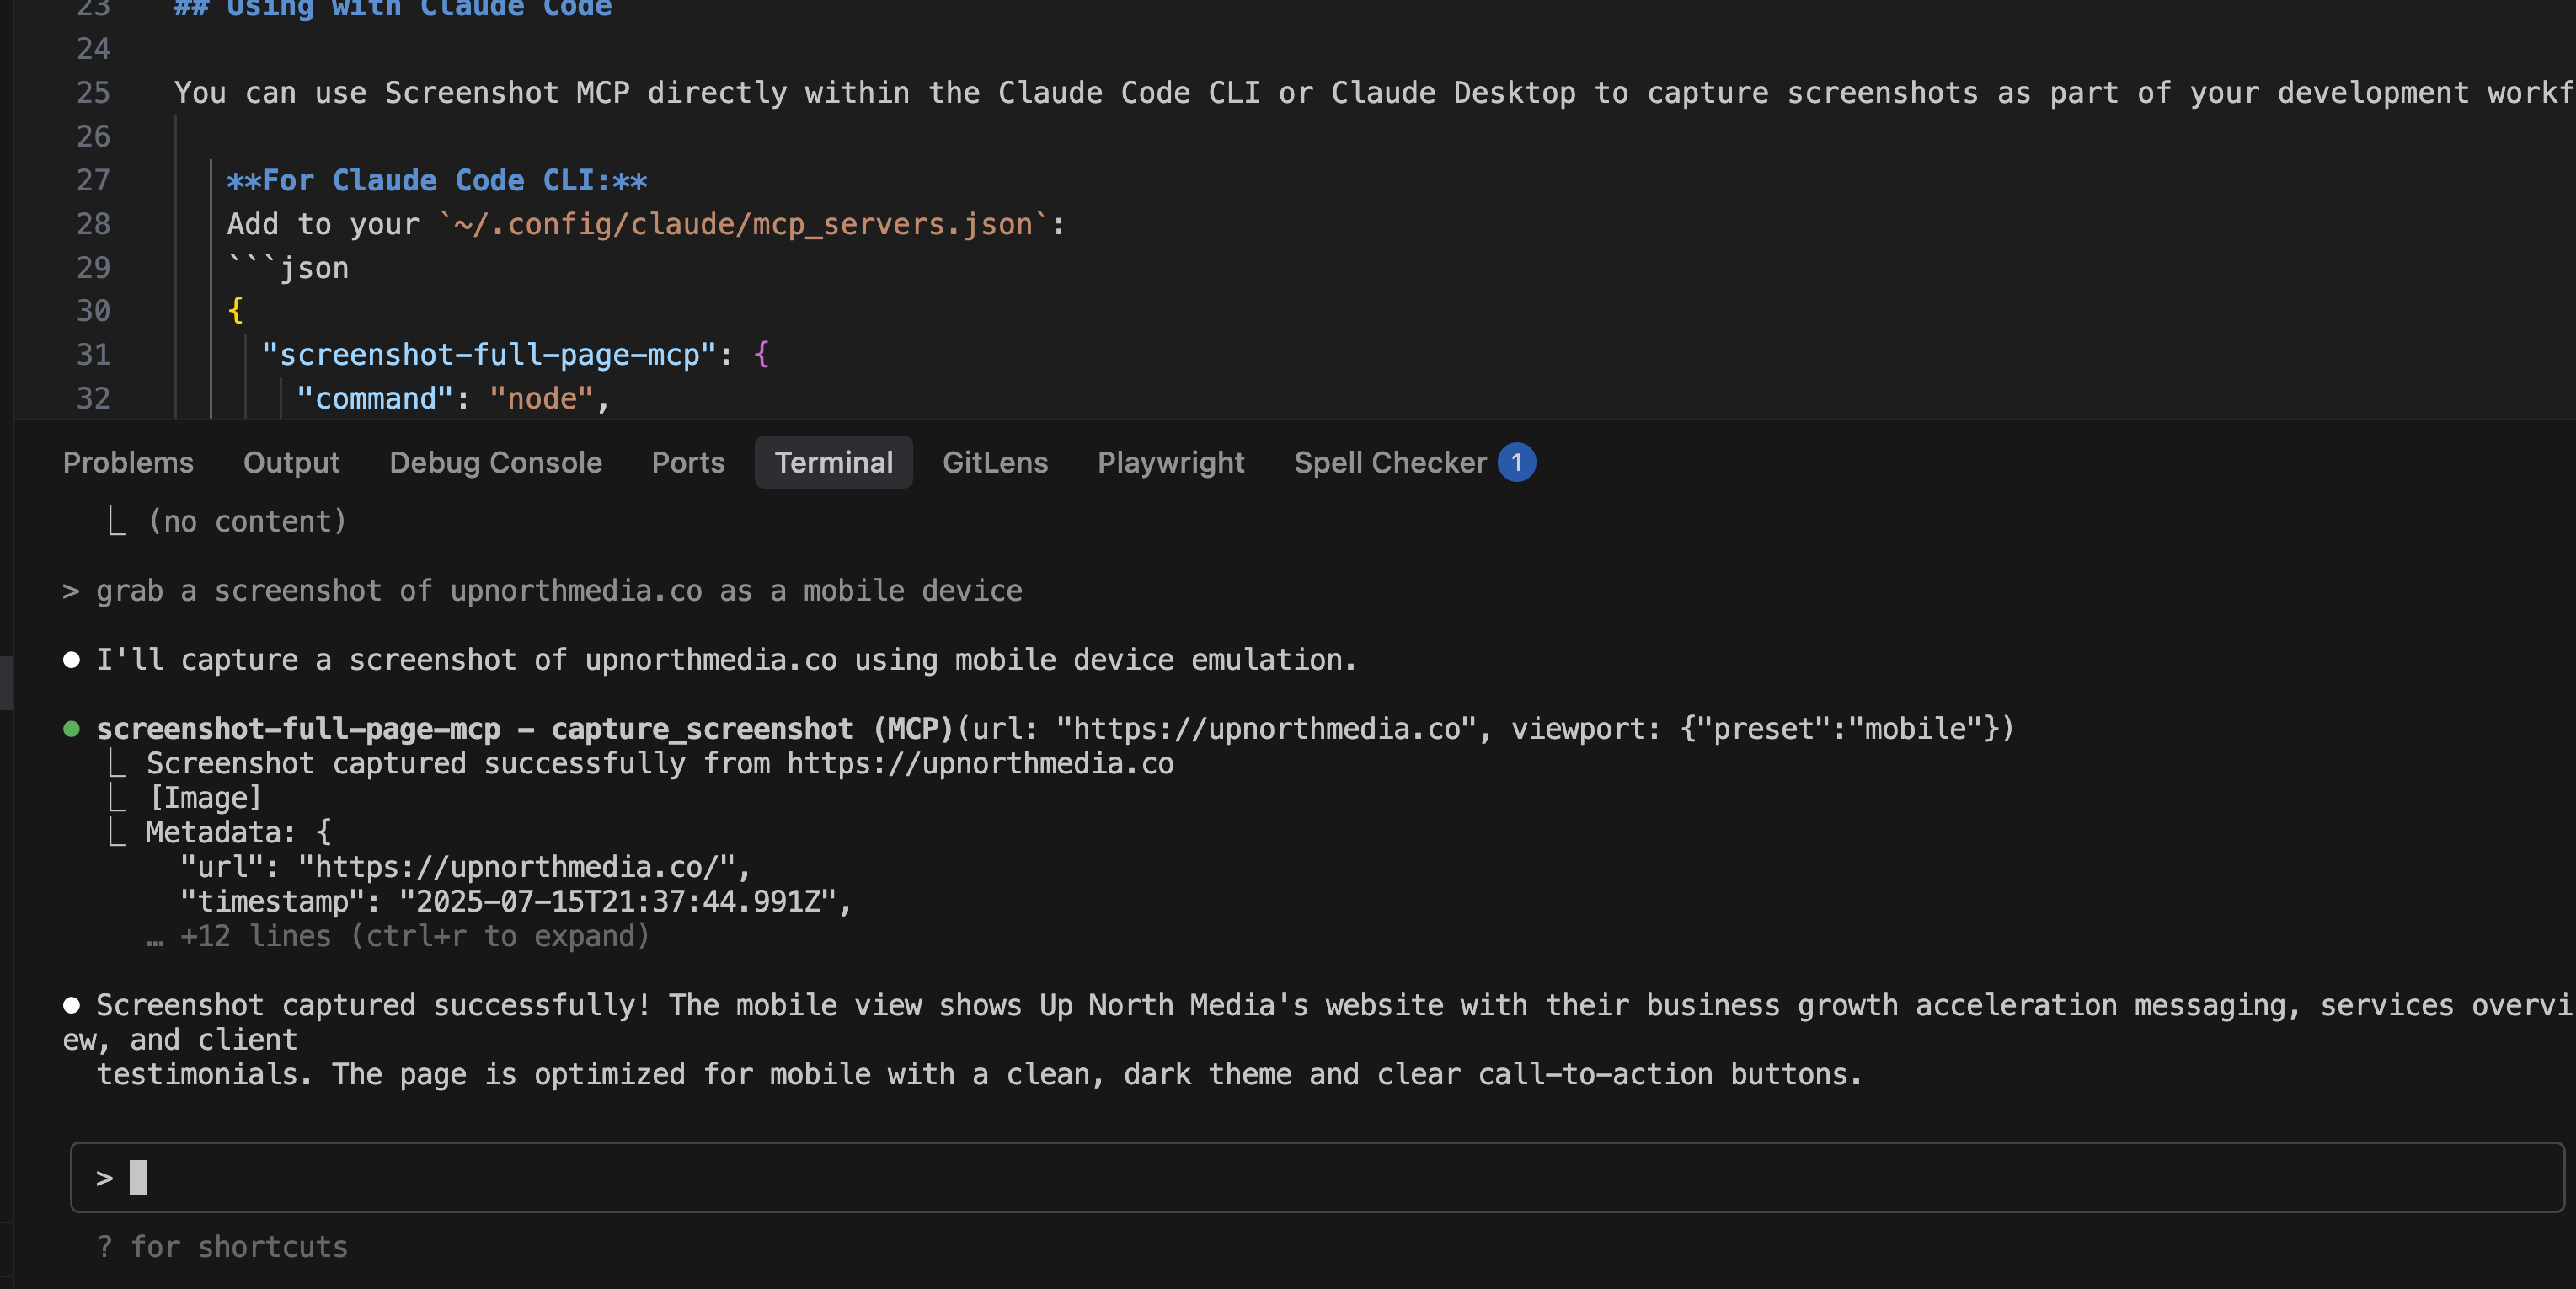
Want to See How It Looks on Mobile?
Say: "Capture a mobile screenshot of https://myapp.com"
The AI figures out you want:
{
  "tool": "capture_screenshot",
  "arguments": {
    "url": "https://myapp.com",
    "viewport": {
      "preset": "mobile"
    }
  }
}
Want Just Part of a Page?
Say: "Screenshot just the navigation bar from https://example.com"
And the AI will:
{
  "tool": "capture_element",
  "arguments": {
    "url": "https://example.com",
    "selector": "nav, .navigation, header"
  }
}
The beauty is that you don't need to learn any code – you just ask for what you want in plain English!
Getting This Thing Running (It's Actually Pretty Easy)
Alright, so you want to try this out? Cool! I'll walk you through it step by step. If you're not super technical, don't worry – I'll explain what each step does.
Getting Started
First, you need to get the code onto your computer. Think of this like downloading an app, but for developers:
git clone https://github.com/your-org/ScreenshotMCP.git
cd ScreenshotMCP
What this does: It downloads all our code and moves you into the right folder.
Next, you need to install the dependencies. These are like the ingredients our tool needs to work:
npm install
What this does: It downloads all the other tools and libraries our screenshot tool depends on. This might take a minute or two.
Now, you need to set up your preferences. We've included a template file that you can customize:
cp .env.example .env
# Edit .env with your preferred settings
What this does: It creates a settings file where you can tell the tool how you want it to behave (like how many screenshots to take at once, how long to wait for pages to load, etc.).
Finally, start it up:
npm start
What this does: It starts the tool and gets it ready to take screenshots!
Connecting It to Your AI Tool
Now, here's where it gets interesting. You need to tell your AI tool (like Claude Code) that this screenshot tool exists. It's like introducing two friends so they can work together.
If you're using Claude Code CLI:
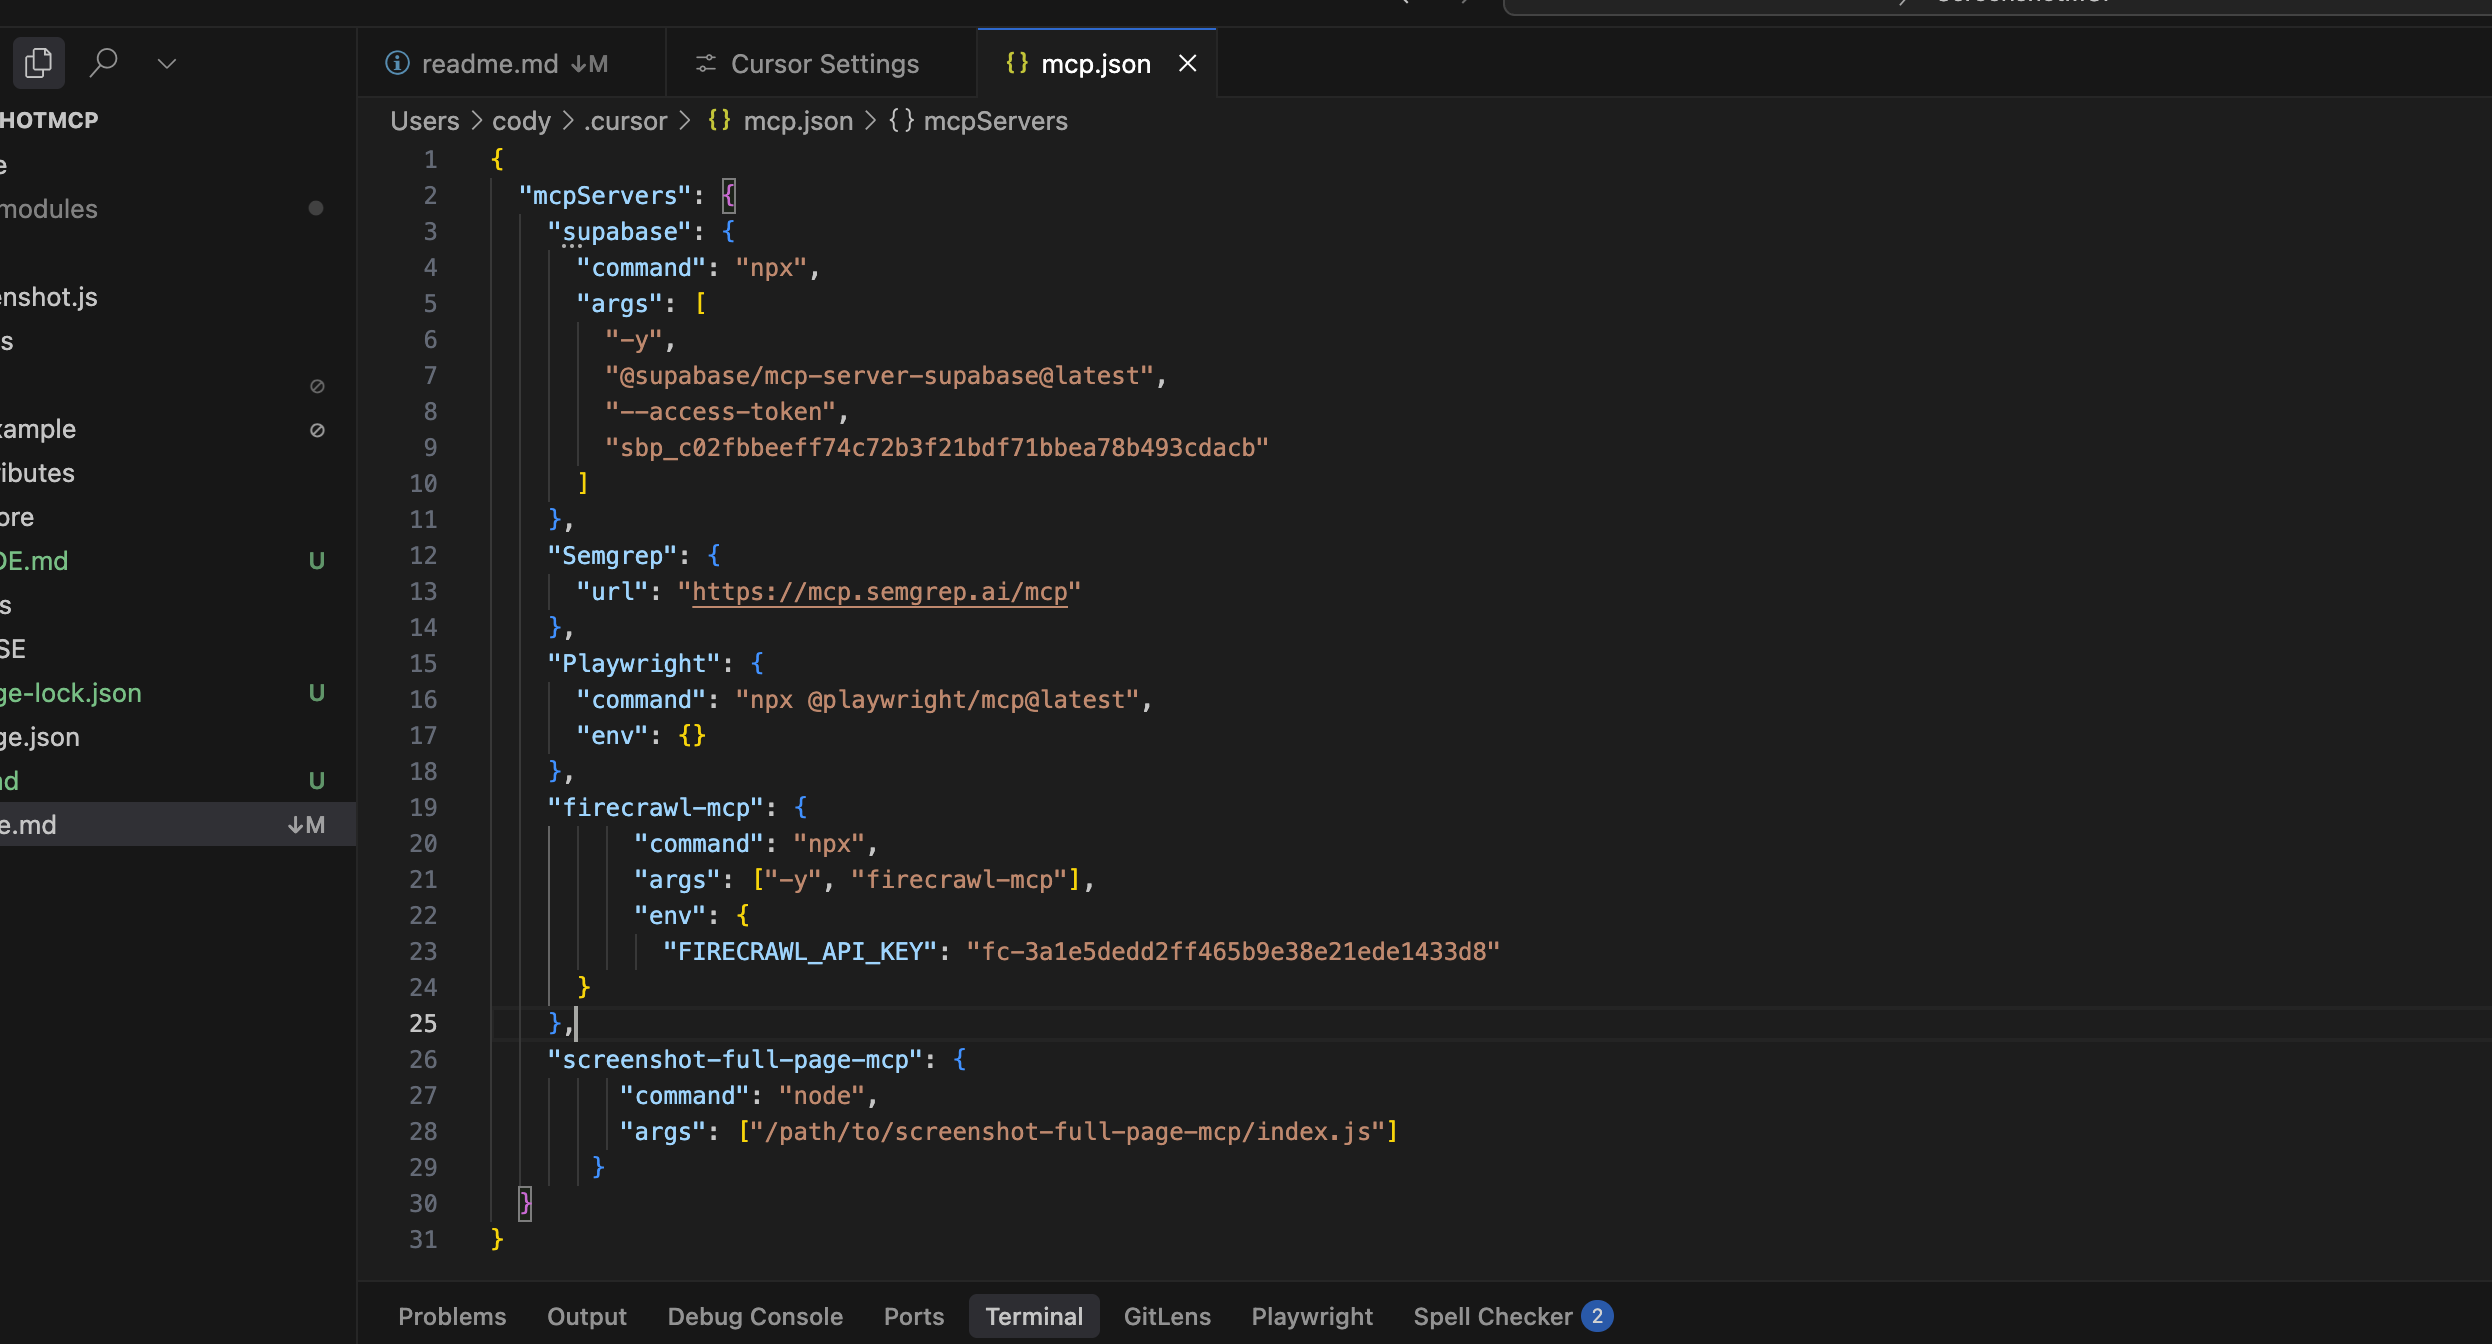
You add this to a file called ~/.config/claude/mcp_servers.json:
{
  "screenshot-full-page-mcp": {
    "command": "node",
    "args": ["/path/to/screenshot-full-page-mcp/index.js"]
  }
}
If you're using Claude Desktop:
You add this to your claude_desktop_config.json:
{
  "mcpServers": {
    "screenshot-full-page-mcp": {
      "command": "node",
      "args": ["/path/to/screenshot-full-page-mcp/index.js"]
    }
  }
}
Don't worry if this looks confusing – it's just telling Claude where to find our screenshot tool and how to talk to it.
Tweaking the Settings (Optional)
Remember that .env file we created? You can open it and change things like:
# Browser Configuration
BROWSER_HEADLESS=true          # Run browser invisibly (recommended)
BROWSER_TIMEOUT=30000          # How long to wait before giving up (30 seconds)
MAX_CONCURRENT_SCREENSHOTS=5  # How many screenshots at once

# Screenshot Defaults
DEFAULT_VIEWPORT_WIDTH=1920    # Default screen width
DEFAULT_VIEWPORT_HEIGHT=1080   # Default screen height
DEFAULT_WAIT_TIMEOUT=10000     # How long to wait for pages to load

# Security
RATE_LIMIT_REQUESTS=100        # How many requests per minute
RATE_LIMIT_WINDOW=60000        # Rate limit window (1 minute)
The comments (everything after the #) explain what each setting does. The default values work great for most people, but you can adjust them if needed.
We Made Sure It's Safe and Fast
Security (Because Nobody Wants Problems)
Look, we know the internet can be a scary place, so we built in some safeguards:
- URL Validation: It only visits real websites (HTTP/HTTPS), not sketchy links
- CSS Selector Sanitization: Prevents malicious code from sneaking in
- Rate Limiting: Won't let anyone overload your system with requests
- Sandboxed Execution: The browser runs in its own isolated environment
Think of it like having a bouncer at a club – they check IDs, limit how many people can come in, and make sure troublemakers stay out.
Performance (Because Nobody Likes Slow Tools)
We also made sure it runs well without hogging all your computer's resources:
- Smart Request Management: Limits how many screenshots happen at once
- Memory Cleanup: Automatically cleans up after itself so it doesn't slow down over time
- Image Optimization: Makes sure images aren't unnecessarily huge
- Resource Monitoring: Keeps track of how much computer power it's using
How We're Actually Using This at Up North Media
Since we built this thing, we've been using it in some pretty cool ways:
E-commerce Testing
We have a client with an online store, and we use ScreenshotMCP to automatically capture how their product pages look on different devices. No more manually checking every single product on mobile, tablet, and desktop – the AI does it for us.
Marketing Campaign Documentation
When we're running A/B tests for landing pages, we automatically capture screenshots of each version. This makes it super easy to show clients what we tested and what worked best.
Client Progress Reports
Instead of trying to describe what we've been working on, we just show screenshots. Our clients love seeing the actual progress, and it takes us way less time to put together these reports.
Keeping an Eye on Competitors
We set up automated screenshot capture for our clients' competitor websites. Now we can easily track when they update their designs, launch new campaigns, or make changes to their pricing pages.
What Other People Are Doing With It
The cool thing is, other businesses and developers are finding all sorts of creative uses:
- Web developers are using it for cross-browser testing
- Marketing teams are documenting campaign performance
- QA teams are automating visual regression testing
- Product managers are creating visual documentation for their APIs
What's Next?
We're just getting started! Here's what we're working on next:
AI-Powered Analysis
Imagine asking Claude: "How does this website look on mobile?" and getting back actual, useful feedback about the user experience. We're working on making this happen.
Performance Monitoring
We want to combine screenshots with performance metrics, so you can see not just how a site looks, but how fast it loads.
Automated Testing
We're building features that let AI compare screenshots over time and automatically spot visual bugs or changes.
Mobile App Support
Right now it's just websites, but we're working on making it work with mobile apps too.
Ready to Try It?
Here's what you need to do:
- Grab the code from our GitHub repository
- Follow the setup steps I outlined above (seriously, it's not that hard)
- Connect it to Claude Code or another AI tool you're using
- Start playing around with it!
The whole thing is open-source, which means it's free to use and you can modify it however you want.
Building with AI tools also means understanding how AI engines read and cite the web. If you are curious how your own site shows up in AI answers, our AEO audit breaks down your visibility across ChatGPT, Perplexity, and AI Overviews.
Final Thoughts
Building ScreenshotMCP has been one of those projects where we solved our own problem and realized it could help a lot of other people too. The whole Model Context Protocol thing is still pretty new, but I think it's going to change how we think about AI tools.
Instead of AI being this separate thing that lives in its own world, MCPs let AI actually interact with the tools we use every day. ScreenshotMCP is just the beginning – imagine AI that can help you with design tools, marketing platforms, development environments, or pretty much anything else.
If you're curious about what's possible, definitely give ScreenshotMCP a try. And if you build something cool with it, we'd love to hear about it!
Want to get started? Download ScreenshotMCP and see what you can build with it!